

If you’ve ever stood in front of the fridge at 5:37 PM thinking, “I need something fast… but also not a total nutritional dumpster fire,” then Healthy Baked Chicken Quesadilla is about to become your new weeknight bestie.
This recipe gives you that gooey-cheesy, crispy-tortilla comfort we all crave—without the greasy pan-frying drama. We’re baking these beauties, which means less mess, less babysitting, and more time to do literally anything else (like convincing a kid that bell peppers are not “spicy candy”).
Chicken is basically my love language. It’s flexible, forgiving, and always ready to shine—even when the day is… a lot. Let’s make a Healthy Baked Chicken Quesadilla that tastes like a treat but fits into real life.
Table of Contents
Why You’ll Love This Healthy Baked Chicken Quesadilla
- Crispy without frying: The oven + a hot tray gives you that golden crunch.
- Weeknight-friendly: Simple steps, basic ingredients, big flavor.
- Protein + veggies in every bite: Chicken, peppers, onion… it’s basically a balanced meal wearing a tortilla.
- Meal-prep approved: Make the filling ahead and dinner becomes assembly only.
Ingredients You’ll Need
For the spiced chicken
- 1/2 tsp pepper
- 1 tsp ground cumin
- 1/2 tsp cayenne pepper
- 1 tsp ground paprika
- 1 tsp garlic powder
- 14 oz chicken breast (cut into 1-inch pieces)
- 1/2 tsp salt (Morton Coarse Kosher Salt works great)
For the vegetable mixture
- 1/2 small onion (finely diced)
- 1 tbsp olive oil (extra virgin)
- 1 garlic clove (minced)
- 1 green bell pepper (finely diced)
- 1 red bell pepper (finely diced)
For the assembly
- Olive oil spray
- 4 flour tortillas (8 inch)
- 1 cup shredded cheese (cheddar or Mexican blend)
How to Make Healthy Baked Chicken Quesadilla
Step 1: Prep the chicken + start the veggie filling
- In a bowl, add the chicken pieces and all the spices: pepper, cumin, cayenne, paprika, garlic powder, and salt.
- Mix until every piece looks coated and ready to strut its stuff.
Now grab a skillet:
- Heat 1 tbsp olive oil over high heat.
- Add diced onion and minced garlic. Cook for 1 minute (just until fragrant—don’t let the garlic go from “yum” to “why does it smell like regret?”).
- Add the diced green and red bell peppers. Cook for 2 minutes, until they start softening but still have a little bite.
- Transfer vegetables to a bowl.
Step 2: Cook the chicken
- Put the skillet back on the stove (no need to wash—flavor lives here).
- Add the chicken pieces in a single layer if possible.
- Cook until browned and fully cooked through, stirring as needed.
When done, transfer the chicken into the bowl with the vegetables.
Important move: Let the filling cool.
- Spread it on a plate to cool faster, or pop it in the fridge for a quick chill.
This helps keep your tortillas from getting soggy and makes assembling easier.
Step 3: Preheat oven + heat the baking tray
Preheat your oven to:
- 220°C / 430°F (standard) or
- 200°C / 390°F (fan/convection)
Lightly spray a baking tray with olive oil and place it in the oven while you assemble.
That hot tray is the secret handshake for crispy tortillas.
Step 4: Assemble the quesadillas
- Lay out your tortillas.
- Divide the cooled filling between the tortillas, covering only half of each tortilla.
- Sprinkle cheese on top of the filling (because we’re being healthy, not joyless).
- Fold each tortilla in half and press down gently but firmly.
Step 5: Bake to crispy perfection
- Carefully remove the hot tray from the oven.
- Place the quesadillas on the tray—you should hear a light sizzle (music to my ears).
- Bake for 8 minutes.
- Flip each quesadilla over the folded edge and press down with a spatula.
- Bake for another 8 minutes, until crispy and golden.
Step 6: Serve and enjoy
Slice into wedges and serve immediately while they’re hot and crunchy.
Cooking Tips (Because Real Life Happens)
- Cool the filling—seriously. Warm filling = steam. Steam = sad tortillas.
- Cut veggies small. Tiny dice means better bites and fewer “why is this onion so loud?” complaints.
- Don’t overstuff. I know it’s tempting. I’ve been there. But overstuffing leads to cheese escapees on the tray (delicious… but chaotic).
- Want extra crisp? A light spritz of olive oil on top of the folded tortilla helps it brown beautifully.
- Cheese upgrade tip: If you’re using cheddar, a small handful of Mexican blend mixed in makes it extra melty and punchy.
And if your quesadilla looks slightly lumpy before baking? Congratulations—you made it at home like a normal person. It’ll bake up gorgeous.
A Little Story From My Kitchen
This Healthy Baked Chicken Quesadilla became my “save the day” dinner during one of those weeks where everything felt scheduled down to the minute. You know the kind—work, laundry, life, and someone always needs a snack exactly 12 minutes after you sit down.
The first time I baked quesadillas instead of pan-frying, I honestly didn’t expect much. Then I pulled out this crispy, golden, cheesy masterpiece—without standing at the stove flipping tortillas like a short-order cook. It felt like kitchen magic… which, as you can guess, is kind of my favorite thing.
FAQs About Healthy Baked Chicken Quesadilla
Can I make this Healthy Baked Chicken Quesadilla ahead of time?
Yes! Make the chicken and veggie filling up to 3 days ahead and store it in the fridge. When you’re ready, assemble and bake.
What’s the best way to store leftovers?
Store cooked quesadillas in an airtight container in the fridge for up to 3 days. Reheat in the oven or air fryer to bring back the crisp (microwave works, but it’ll be softer).
Can I swap the chicken breast for another cut?
Absolutely. Boneless, skinless chicken thighs work great and stay extra juicy. Just cook until fully done.
Can I use different veggies?
Totally. Corn, zucchini, spinach, or mushrooms are all good. Just keep the pieces small and don’t add watery veggies without cooking them first.
How do I make it a little less spicy?
Reduce or skip the cayenne pepper. You’ll still have lots of flavor from paprika, cumin, and garlic powder.
Serve It Up and Make It Your Thing
This is the kind of dinner that makes you feel like you’ve got it together—even if the rest of the day was held together by dry shampoo and good intentions. Pair your Healthy Baked Chicken Quesadilla with salsa, Greek yogurt (a great sour cream swap), or a simple side salad if you’re feeling fancy.
And if you make it, I hope it brings a little calm and crunch to your evening. Because sometimes the best kind of healthy is the kind you actually want to eat—especially when it’s hot, cheesy, and perfectly crisp.
Keep the Chicken Magic Going
- If you loved the crispy, cheesy vibe here, you’ll probably also want to try super-crunchy BBQ Chicken Quesadillas for an easy weeknight dinner.
- Want the same Tex-Mex comfort in a cozy bowl (hello, meal prep)? Make Creamy Chicken Tortilla Soup that’s perfect for leftovers.
- Need a fresh side that balances the melty quesadilla moment? Pair it with Street Corn Creamy Cucumber Salad that tastes like summer.
- Craving another “healthy but still fun” chicken dinner? Add Healthy Chicken Crunch Wrap for a quick handheld meal to your rotation.
Tried this Healthy Baked Chicken Quesadilla? Please leave a review and click your star rating ⭐⭐⭐⭐⭐—I’d love to know how it turned out for you!

Healthy Baked Chicken Quesadilla
- Total Time: 35 minutes
- Yield: 4 servings (4 quesadillas) 1x
Description
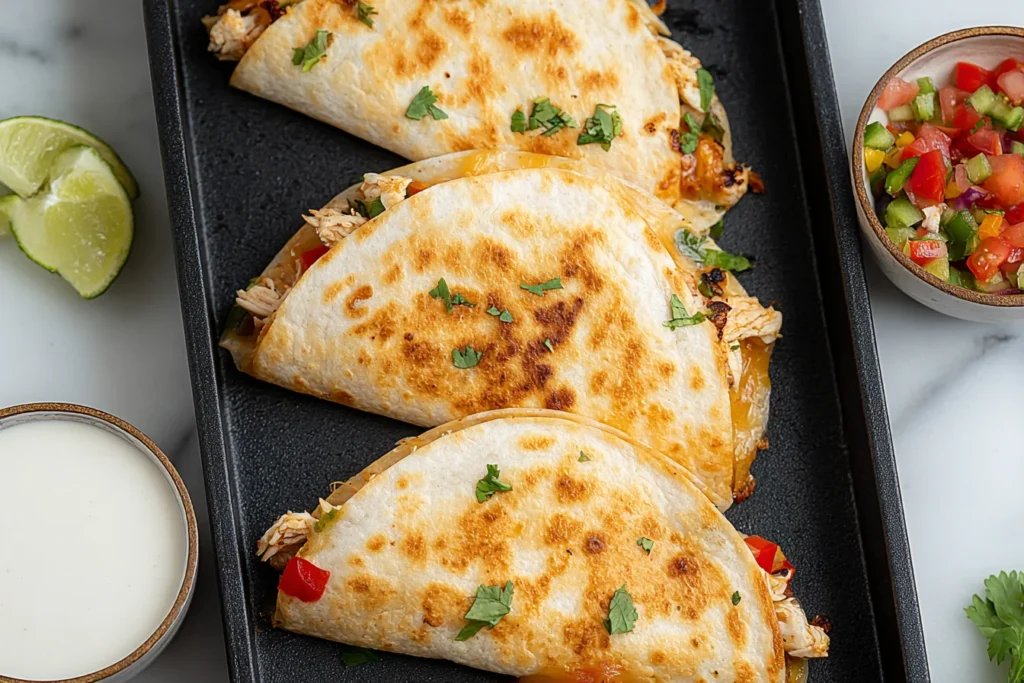
This Healthy Baked Chicken Quesadilla is crispy on the outside, cheesy on the inside, and packed with spiced chicken and sautéed peppers. Oven-baked instead of fried, it’s a lighter, family-friendly dinner perfect for busy weeknights.
Ingredients
For the spiced chicken:
- 14 oz chicken breast, cut into 1-inch pieces
- 1/2 tsp salt
- 1/2 tsp black pepper
- 1 tsp ground cumin
- 1/2 tsp cayenne pepper
- 1 tsp ground paprika
- 1 tsp garlic powder
For the vegetable mixture:
- 1 tbsp olive oil
- 1/2 small onion, finely diced
- 1 garlic clove, minced
- 1 green bell pepper, finely diced
- 1 red bell pepper, finely diced
For assembly:
- Olive oil spray
- 4 (8-inch) flour tortillas
- 1 cup shredded cheese (cheddar or Mexican blend)
Instructions
- Season the chicken:
In a bowl, combine chicken with salt, pepper, cumin, cayenne, paprika, and garlic powder. Mix well to coat evenly. - Cook the vegetables:
Heat olive oil in a skillet over high heat. Add onion and garlic; cook for 1 minute. Add bell peppers and cook for 2 minutes until slightly softened. Transfer to a bowl. - Cook the chicken:
In the same skillet, cook the chicken until browned and fully cooked through. Transfer to the bowl with vegetables. Let filling cool completely. - Preheat oven:
Preheat to 430°F (220°C) standard or 390°F (200°C) fan. Lightly spray a baking tray with olive oil and place it in the oven to heat. - Assemble quesadillas:
Divide filling over half of each tortilla. Top with cheese. Fold tortillas in half and press gently. - Bake:
Place quesadillas on the hot tray. Bake 8 minutes. Flip carefully, press lightly with a spatula, and bake another 8 minutes until golden and crispy. - Serve:
Slice and serve immediately.
Notes
- Let the filling cool before assembling to prevent soggy tortillas.
- Don’t overfill — it makes flipping harder.
- For extra crispiness, lightly spray the tops before baking.
- Store leftovers up to 3 days and reheat in oven or air fryer for best texture.
- Prep Time: 15 minutes
- Cook Time: 20 minutes
- Category: Main Dish
- Method: Baking
- Cuisine: Mexican-Inspired
Nutrition
- Serving Size: 1 quesadilla
- Calories: 410 kcal
- Sugar: 4 g
- Sodium: 620 mg
- Fat: 16 g
- Saturated Fat: 7 g
- Unsaturated Fat: 7 g
- Trans Fat: 0 g
- Carbohydrates: 34 g
- Fiber: 3 g
- Protein: 36 g
- Cholesterol: 85 mg