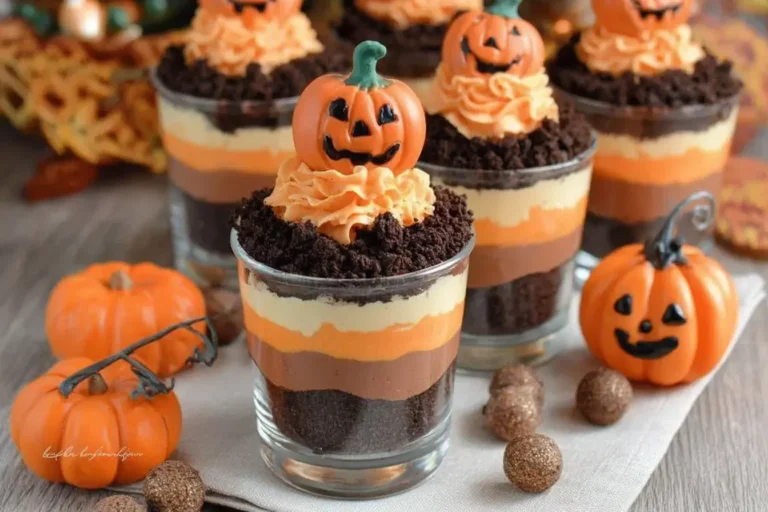
If fall had a mascot, it would definitely be these Pumpkin Patch Dirt Cups. They’re sweet, creamy, delightfully messy, and just the right amount of spooky-cute for the season. Whether you’re planning a Halloween bash, a cozy family night, or a fun weekend activity with the kids, these little desserts bring all the pumpkin patch vibes—minus the muddy shoes.
As a mom and self-proclaimed fall enthusiast, I can tell you—these cups are pure joy in a jar. They’re no-bake (yes, you read that right), kid-approved, and come together faster than you can say “pumpkin spice everything.”
Table of Contents
Why You’ll Love These Pumpkin Patch Dirt Cups
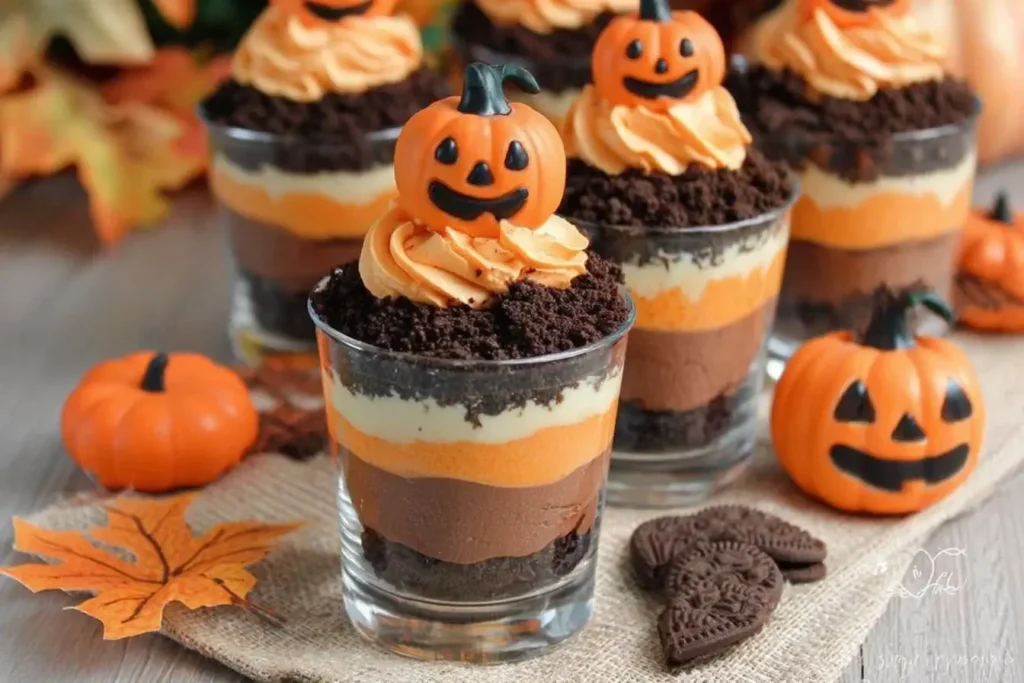
These aren’t your ordinary pudding cups. Oh no, these are Pumpkin Patch Dirt Cups—a layered masterpiece of chocolate, pumpkin-spice pudding, crushed cookies, and whimsical candy pumpkins on top. Each spoonful gives you a little taste of fall heaven.
Here’s why you’ll want to whip these up ASAP:
- No baking required. Because sometimes the oven deserves a nap too.
- Perfect for parties. Kids and adults both love digging into these.
- Totally customizable. Want more Oreos? Add ‘em. Want extra worms? You rebel, go for it.
- Quick cleanup. Just toss the cups when you’re done (or reuse glass jars for an eco-friendly twist).
Ingredients You’ll Need
Grab your cozy sweater and your mixing bowls—here’s what you’ll need for this pumpkin patch adventure:
- 1 box instant chocolate pudding mix
- 1 box instant vanilla pudding mix (or pumpkin spice flavor if you can find it!)
- ½ cup canned pumpkin puree
- 1 tsp pumpkin pie spice
- 4 cups milk (2 cups per pudding box)
- 1 cup whipped topping (like Cool Whip)
- Crushed Oreos
- Graham crackers (optional, for extra crunch)
- Gummy worms
- Candy pumpkins
- Small clear plastic cups or glass jars
💡 Chef’s Tip: The clear cups are key—they show off those beautiful layers!
How to Make Pumpkin Patch Dirt Cups
Ready to play in the (cookie) dirt? Let’s go!
- Mix up the chocolate pudding.
In a medium bowl, whisk together the chocolate pudding mix and 2 cups of milk. Chill for about 5–10 minutes until it thickens. - Create the pumpkin layer.
In another bowl, whisk together the vanilla pudding mix and the remaining 2 cups of milk. Stir in the pumpkin puree and pumpkin pie spice until smooth and dreamy. - Add the fluff factor.
Gently fold in the whipped topping. This step makes your pumpkin pudding light, airy, and irresistible. - Start layering like a pro.
- Spoon a layer of chocolate pudding into each cup.
- Add a handful of crushed Oreos for that “dirt” effect.
- Top with the pumpkin pudding mixture.
- Finish with another sprinkle of Oreos or crushed graham crackers to make it look like a real pumpkin patch.
- Decorate and have fun!
Press a few candy pumpkins on top, tuck in some gummy worms, and sprinkle a little extra “dirt” for good measure.
👩🍳 Aneta’s Note: Don’t worry if your layers aren’t perfect—pumpkin patches aren’t either! The “messy charm” is what makes these adorable.
Tips for Making the Best Pumpkin Patch Dirt Cups
- Chill before serving. These cups taste best after resting in the fridge for about 30 minutes. It lets the flavors mingle like old friends at a fall festival.
- Make ahead. You can prep them a day early! Just add the toppings right before serving so the cookies stay crunchy.
- Kid-friendly fun. Let the kids decorate their own cups—it’s a surefire way to keep little hands busy (and happy).
- Adult twist. Want to make it grown-up? Add a splash of Baileys Pumpkin Spice or Kahlúa to the pudding mix for a cheeky fall dessert.
FAQs About Pumpkin Patch Dirt Cups
Can I use homemade pudding instead of instant?
Absolutely! Just make sure it’s fully cooled before layering so your whipped topping doesn’t melt.
Can I make this dairy-free?
Yes! Use almond or oat milk with dairy-free pudding mix and whipped topping. Still creamy, still delicious.
How long do they last in the fridge?
Up to 2–3 days, but good luck keeping them that long—these disappear fast!
A Little Magic in Every Cup
These Pumpkin Patch Dirt Cups are the ultimate reminder that dessert doesn’t have to be complicated to be memorable. A little pudding, a little pumpkin, and a sprinkle of creativity can turn your kitchen into a fall wonderland.
When I first made these, my kids devoured them before I could even grab a photo (true story). Now, they’re our go-to Halloween treat—and a guaranteed crowd-pleaser for any fall gathering.
So, grab your spoon and dig in. Because who says you can’t play in the dirt as an adult?
More Fall-Inspired Recipes You’ll Love
If you can’t get enough of cozy autumn flavors and festive treats like these Pumpkin Patch Dirt Cups, here are a few more recipes that will make your kitchen smell like a fall wonderland. Each one pairs perfectly with a steaming mug of cider or your favorite cozy blanket!
- Warm up your evenings with a savory and comforting Pumpkin Sage and Mushroom Tart — flaky pastry, earthy mushrooms, and herby pumpkin filling that feels like a hug on a plate.
- For something sweet yet simple, try my Pumpkin Maple Cookies — soft, spiced, and drizzled with maple icing (basically fall in cookie form!).
- Hosting a spooky party? These Ghostly Yogurt Parfaits are a healthy, Halloween-ready treat the whole family will love.
- And if you’re craving something savory to balance all that sweetness, dig into my creamy and flavorful Pumpkin Chicken Meatballs in Sage Cream Sauce — the perfect cozy dinner to follow your dessert!
Each of these recipes keeps the fall fun going with easy steps, comforting flavors, and a little sprinkle of Chicken Magic charm.
Print
Pumpkin Patch Dirt Cups
- Total Time: 20 minutes
- Yield: 6 servings 1x
Description
These Pumpkin Patch Dirt Cups are a fun, no-bake Halloween dessert layered with chocolate pudding, pumpkin spice cream, and crushed Oreos. Adorably topped with candy pumpkins and gummy worms, they’re the perfect sweet treat for fall parties, family nights, or festive gatherings. Quick, creamy, and irresistibly cute!
Ingredients
-
1 box instant chocolate pudding mix
-
1 box instant vanilla pudding mix (or pumpkin spice flavor)
-
½ cup canned pumpkin puree
-
1 tsp pumpkin pie spice
-
4 cups milk (2 cups per pudding box)
-
1 cup whipped topping (Cool Whip or similar)
-
Crushed Oreos
-
Graham crackers (optional)
-
Gummy worms
-
Candy pumpkins
-
Small clear plastic cups or glass jars
Instructions
-
In a medium bowl, whisk together chocolate pudding mix and 2 cups milk. Chill for 5–10 minutes until thickened.
-
In another bowl, whisk together vanilla pudding mix and remaining 2 cups milk. Stir in pumpkin puree and pumpkin pie spice until smooth.
-
Fold whipped topping into the pumpkin pudding for a lighter texture.
-
Spoon a layer of chocolate pudding into each cup.
-
Add a layer of crushed Oreos.
-
Spoon pumpkin pudding over the Oreo crumbs.
-
Top with more Oreos or crushed graham crackers to create the “dirt” layer.
-
Decorate with candy pumpkins, gummy worms, and sprinkles. Chill until ready to serve.
Notes
-
You can use pumpkin spice pudding mix instead of vanilla for extra fall flavor.
Chill the cups for at least 30 minutes before serving to let the layers set.
Make them a day ahead and add toppings just before serving.
For a dairy-free version, use almond or oat milk and non-dairy whipped topping.
- Prep Time: 20 minutes
- Cook Time: 0 minutes
- Category: Dessert
- Method: No Bake
- Cuisine: American
Nutrition
- Serving Size: 1 cup
- Calories: 320 kcal
- Sugar: 32 g
- Sodium: 310 mg
- Fat: 13 g
- Saturated Fat: 6 g
- Unsaturated Fat: 6 g
- Trans Fat: 0 g
- Carbohydrates: 46 g
- Fiber: 2 g
- Protein: 5 g
- Cholesterol: 25 mg