
If Peanut Butter Oat Cups sound like the kind of snack that can rescue you from the 3:17 p.m. “I need something sweet right now” moment… you’re in the right kitchen. And if you’re juggling work, kids, errands, or simply the emotional weight of deciding what to make for dinner (again), I see you.
These little cups are the definition of low effort, high reward. They’re chewy, chocolatey, and taste like a fancy candy bar’s down-to-earth best friend. No baking, no mixer, no dramatic clean-up. Just a bowl, a spoon, and a freezer doing the heavy lifting—honestly, the freezer is the real MVP here.
And even though chicken is my usual love language, I fully support snack emergencies. Especially when they involve peanut butter and chocolate. Let’s make magic.
Table of Contents
Why You’ll Love These Peanut Butter Oat Cups
- No-bake bliss. If your oven is basically a storage cabinet, welcome home.
- Fast prep. You’ll spend more time waiting for the freeze than actually making them.
- Two filling options. Go classic or add protein—because sometimes we’re “treating ourselves,” and sometimes we’re “being responsible adults.”
- Perfect for busy days. Make a batch once, and you’ve got grab-and-go snacks all week.
Ingredients You’ll Need
Oat Base
- 2/3 cup peanut butter
- 3/4 cup old fashioned (rolled oats)
- 2 tbsp maple syrup
Filling Options
Regular Filling
- 1 tbsp peanut butter per oat cup
Protein Filling
- 1/2 cup peanut butter
- 3 tbsp protein powder
Chocolate Coating
- 1 cup chocolate chips (melted)
- 2 tsp oil (helps the chocolate stay smooth)
- Flakey sea salt (optional, but highly recommended if you like that sweet-salty “wow” moment)
Tools That Make Life Easier
- Silicone molds (mini muffin size is perfect)
- Cookie scoop (optional, but super helpful for even portions)
- Spoon (the reliable friend who never flakes)
How to Make Peanut Butter Oat Cups Step-by-Step
1) Mix the base
In a bowl, stir together 2/3 cup peanut butter and 2 tbsp maple syrup until smooth and glossy.
2) Add the oats
Pour in 3/4 cup rolled oats and mix until everything is evenly coated. You’re looking for a thick, sticky mixture that holds together when pressed.
3) Press into molds
Scoop the oat mixture into silicone molds.
I like using a cookie scoop—about 2 tablespoons per cup for the base.
Press it down firmly with the back of a spoon so it’s even and compact. (This is key. A loose base = a crumbly snack tragedy.)
4) Add your filling
Now you’ve got choices:
Regular filling: Add a dollop (about 1 tbsp) of peanut butter on top of each oat base.
Protein filling: In a small bowl, mix 1/2 cup peanut butter + 3 tbsp protein powder until thick and spreadable. Spoon it onto each cup and smooth it out.
5) Freeze (round one)
Pop the molds into the freezer for 20 minutes so the filling firms up.
6) Melt the chocolate
While they chill, melt 1 cup chocolate chips with about 2 tsp oil in the microwave.
Do it in 30-second bursts, stirring well after each round. (Chocolate is dramatic. Stirring keeps it calm.)
7) Top with chocolate + freeze again
Spoon melted chocolate over the top of each oat cup.
Freeze for another 20 minutes until the chocolate sets.
8) Finish and enjoy
Remove from molds/liners, sprinkle with flakey sea salt if you want that sweet-and-salty sparkle, and enjoy.
Try not to “taste test” three in a row standing at the freezer. (Or do. I’m not your snack supervisor.)
Little Tips That Make Them Even Better
- Press the base firmly. Think “packing a sandcastle,” not “gently placing a baby bird.”
- Warm peanut butter spreads easier. If your peanut butter is stiff, microwave it for 10–15 seconds before dolloping.
- Oil in chocolate is your friend. It helps the chocolate stay silky and less likely to crack.
- Sea salt is optional… but wow. It turns “good” into “where have you been all my life?”
My Quick Story With These Cups
The first time I made these, it was one of those days where I had big plans… and then life laughed. I needed something sweet, but I didn’t want to bake (or wash a mountain of dishes). These Peanut Butter Oat Cups became my go-to “I’ve got it together” snack—because they look impressive, but secretly they’re incredibly easy.
Now I keep a batch in the freezer for when cravings hit, guests drop by, or I just need a little edible comfort.
FAQs About Peanut Butter Oat Cups
Can I use quick oats instead of rolled oats?
You can, but rolled oats give the best chewy texture. Quick oats make the base softer and a bit more compact.
What protein powder works best for the protein filling?
Most types work (whey or plant-based). Choose one you actually like the taste of, since it will flavor the filling.
How do I store Peanut Butter Oat Cups?
Store them in an airtight container in the freezer. They keep well for about 2–3 weeks (though mine rarely last that long).
Can I use milk chocolate instead of dark chocolate?
Absolutely. Dark chocolate gives a richer contrast, but milk chocolate is extra sweet and kid-friendly.
Do I have to use silicone molds?
They help a lot, but you can also use mini muffin liners in a muffin tin—just press firmly so they hold their shape.
Your Next Sweet Moment
If you’ve been craving something that feels like a treat but fits into real-life chaos, Peanut Butter Oat Cups are it. They’re quick, comforting, and just fancy enough to make you feel like you made “a whole dessert” when really you mixed a few ingredients and let the freezer do the work.
Make a batch, stash them away, and the next time your day gets a little too loud, you’ll have Peanut Butter Oat Cups ready to save the moment—one chocolate-topped bite at a time.
Keep the Snack Magic Going
- If you loved the sweet-and-salty vibe of these cups, you’ll probably swoon for Lemon Oatmeal Crumble Bars for an easy, cozy dessert—same “simple ingredients, big comfort” energy.
- Want another chocolate moment that feels bakery-fancy without the stress? Try Samoa Brownies with that caramel-coconut sparkle (dangerously snackable, just saying).
- If you’re on a peanut butter kick (because honestly, who isn’t?), dinner can join the party with Peanut Butter Chicken Curry that’s creamy, cozy, and weeknight-friendly.
- And for a “treat-yourself” bite that’s pretty enough for guests but easy enough for you, don’t miss Chocolate Strawberry Bruschetta for a sweet little wow moment.
If you make these Peanut Butter Oat Cups, I’d love to hear how they turned out—please leave a quick review and tap a star rating ⭐⭐⭐⭐⭐ (your stars help other readers find the recipe, and they totally make my day!).
Peanut Butter Oat Cups
- Total Time: 10 minutes (plus 40 minutes freezing)
- Yield: 8 oat cups 1x
- Diet: Vegetarian
Description
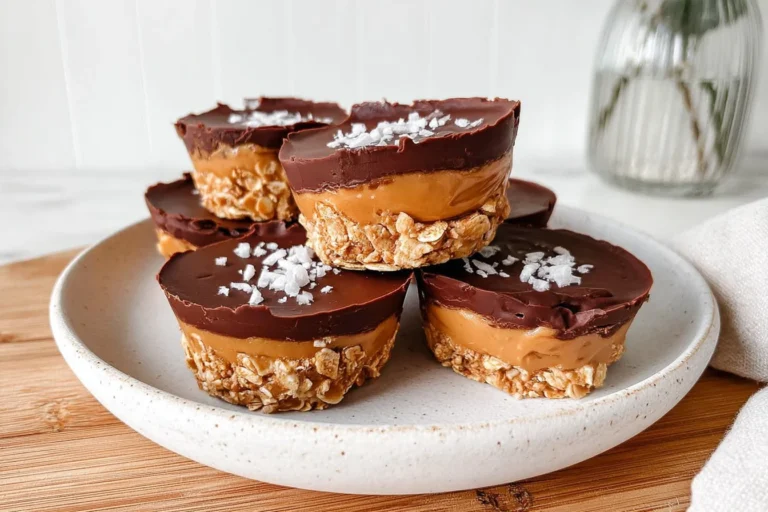
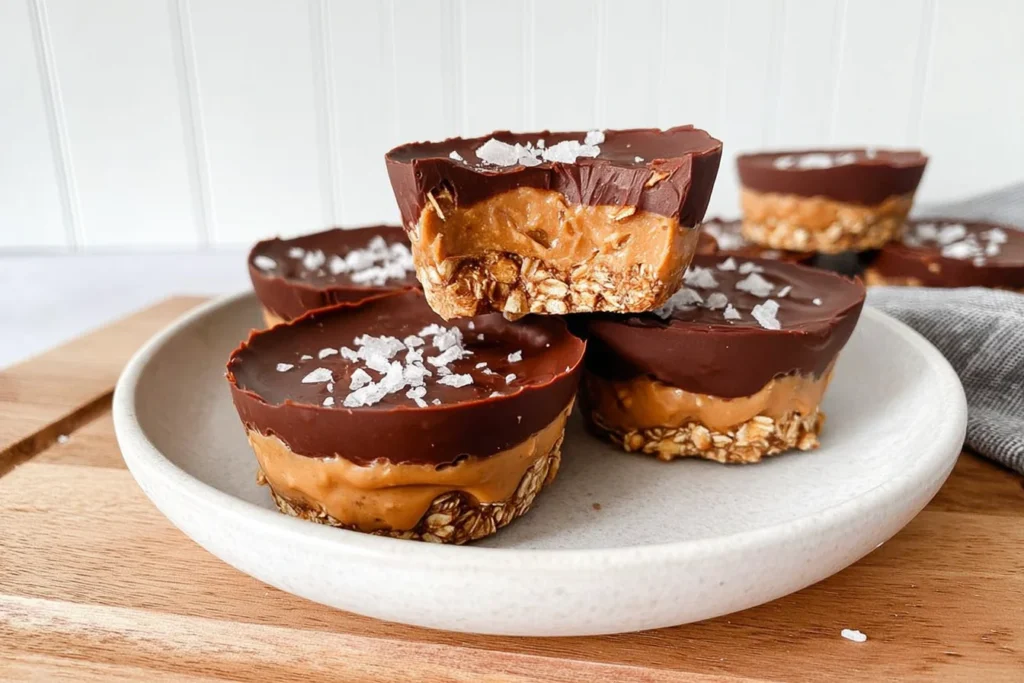
Peanut Butter Oat Cups are an easy no-bake treat made with a chewy oat base, creamy peanut butter center, and a rich chocolate topping finished with flaky sea salt. Perfect for meal prep, snack cravings, or a quick freezer-friendly dessert.
Ingredients
Oat Base
- 2/3 cup peanut butter
- 3/4 cup old fashioned rolled oats
- 2 tbsp maple syrup
Regular Filling
- 1 tbsp peanut butter per oat cup
Protein Filling (Optional)
- 1/2 cup peanut butter
- 3 tbsp protein powder
Chocolate Coating
- 1 cup chocolate chips
- 2 tsp oil (for melting)
- Flaky sea salt (optional)
Instructions
- In a mixing bowl, stir together peanut butter and maple syrup until smooth.
- Add rolled oats and mix until fully combined and sticky.
- Scoop about 2 tablespoons of the oat mixture into silicone muffin molds. Press down firmly with a spoon to form an even base.
- Add 1 tablespoon of peanut butter on top of each base or mix peanut butter with protein powder and spread over each cup.
- Freeze for 20 minutes until firm.
- Melt chocolate chips with oil in the microwave in 30-second increments, stirring between each round until smooth.
- Spoon melted chocolate over each cup to cover the filling.
- Freeze again for 20 minutes or until chocolate is set.
- Remove from molds, sprinkle with flaky sea salt if desired, and enjoy.
Notes
- Press the oat base firmly to prevent crumbling.
- Store in an airtight container in the freezer for up to 3 weeks.
- Let sit at room temperature for 3–5 minutes before eating for the best texture.
- Use dark chocolate for a richer flavor or milk chocolate for a sweeter version.
- Prep Time: 10 minutes
- Cook Time: 0 minutes
- Category: Dessert / Snack
- Method: No Bake
- Cuisine: American
Nutrition
- Serving Size: 1 oat cup
- Calories: 220 Kcal
- Sugar: 9 g
- Sodium: 850 mg
- Fat: 16 g
- Saturated Fat: 6 g
- Unsaturated Fat: 9 g
- Trans Fat: 0 g
- Carbohydrates: 17 g
- Fiber: 3 g
- Protein: 6 g
- Cholesterol: 0 mg