
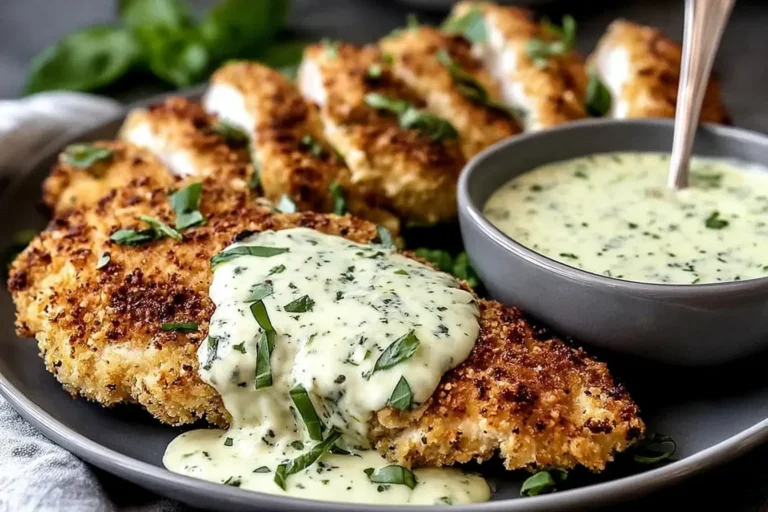
If you’ve ever wished for a chicken dinner that checks all the boxes—crispy, cheesy, juicy, and just fancy enough to impress—then Parmesan Crusted Chicken with Basil Aioli is about to be your new favorite weeknight hero. Imagine this: golden chicken with a cheesy crunch on the outside, tender and juicy inside, topped with a creamy, garlicky basil aioli that tastes like it came straight from a restaurant menu. Yes, friend, we’re living the dream.
The best part? This recipe is simple enough for a Tuesday night yet elegant enough to wow at your next dinner party. It’s the perfect balance between comfort food and sophistication—without sending you into a cooking marathon.
Table of Contents
Why You’ll Love This Parmesan Crusted Chicken with Basil Aioli
- Crispy meets creamy. The Parmesan crust brings the crunch, while the basil aioli adds freshness and tang.
- Family-approved. Even picky eaters can’t resist cheesy-crusted chicken (and you can always keep the aioli on the side for the “sauce skeptics”).
- Quick but impressive. About 30 minutes from start to finish—because let’s face it, no one has time for a three-hour dinner project on a Wednesday.
Ingredients You’ll Need
For the chicken:
- 4 boneless, skinless chicken breasts
- 1 cup grated Parmesan cheese
- 1 cup panko breadcrumbs
- 2 large eggs
- 1/2 cup all-purpose flour
- 1/2 teaspoon salt
- 1/2 teaspoon black pepper
- 2 tablespoons olive oil
For the basil aioli:
- 1/2 cup mayonnaise
- 1/4 cup fresh basil leaves, finely chopped
- 1 clove garlic, minced
- 1 tablespoon lemon juice
How To Make Parmesan Crusted Chicken with Basil Aioli : Step-by-Step
1. Preheat & prep.
Start by preheating your oven to 400°F (200°C). While the oven heats, place your chicken breasts between two sheets of parchment paper or plastic wrap and give them a gentle pounding with a meat mallet (or, let’s be honest, the back of a skillet works too). The goal isn’t to flatten them completely but to even out the thickness so they cook more consistently. Trust me—this step makes all the difference between juicy chicken and the dreaded dry bite.
2. Set up your coating station.
Think of this like an assembly line. Grab three shallow bowls or plates:
- In the first, combine your flour, salt, and black pepper. This light flour dusting helps the egg stick.
- In the second, whisk your eggs until smooth. The egg is your “glue” for the cheesy coating.
- In the third, mix Parmesan cheese and panko breadcrumbs. This is where the magic happens—panko gives that irresistible crunch, and Parmesan brings the salty, nutty punch of flavor.
3. Coat the chicken.
Working one piece at a time, dredge the chicken breast in the flour mixture, shaking off any excess. Dip it into the egg, letting the extra drip away, then press it firmly into the Parmesan-panko mixture. Don’t be shy—really press that coating on so it sticks well. By the time you’re done, your chicken will look like it’s wearing a golden armor of deliciousness.
4. Pan-sear for golden goodness.
Heat the olive oil in a large skillet over medium-high heat. Once it shimmers, carefully add the chicken breasts. Cook for about 2–3 minutes per side, just until they turn a beautiful golden brown. At this stage, you’re not trying to cook them all the way through—just giving them that crunchy exterior and boosting flavor. Your kitchen will start smelling amazing right about now!
5. Bake to perfection.
Transfer the seared chicken onto a baking sheet (a parchment-lined one if you like easy cleanup). Pop it in the oven and bake for 10–12 minutes, or until the chicken reaches an internal temperature of 165°F. Baking ensures the chicken stays juicy inside while keeping that crust crisp and golden. If you’re tempted to skip the oven part—don’t. It’s the secret to perfectly cooked chicken every time.
6. Make the basil aioli.
While the chicken bakes, let’s whip up the star of the show: the basil aioli. In a small bowl, stir together the mayonnaise, finely chopped basil, garlic, and lemon juice. The basil adds freshness, the garlic gives a little bite, and the lemon juice brightens everything up. You’ll want to taste-test this (maybe twice) because it’s that good.
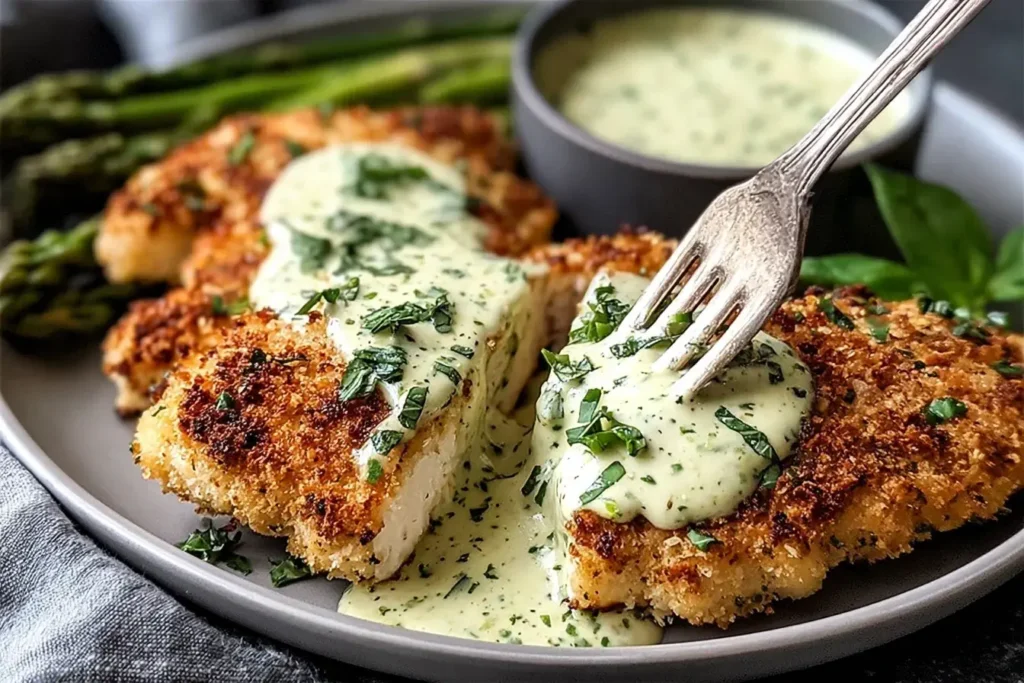
7. Serve & savor.
Once the chicken is done, let it rest for a minute or two—this helps the juices settle inside. Plate it up, then top each piece with a generous dollop of basil aioli. Pair it with a simple green salad, roasted veggies, or even a pile of buttery mashed potatoes. Then, sit back, enjoy, and accept all the compliments coming your way.
Cooking Tips & Tricks
- Shortcut option: Swap fresh basil for store-bought pesto in the aioli if you’re in a pinch—it still tastes heavenly.
- Extra crunch: Toast the panko breadcrumbs in a dry skillet before mixing them with Parmesan for an even crispier coating.
- Kid-friendly tweak: Serve the aioli as a dipping sauce on the side (because sometimes kids just want “plain chicken”).
- Meal prep win: Double the aioli recipe—it’s amazing on sandwiches, wraps, or even as a veggie dip the next day.
A Little Story from My Kitchen
The first time I made this dish, it was for a “fancy dinner night” at home with my family. My kids were skeptical (the green flecks in the sauce had them suspicious), but once they tasted the crispy chicken, the aioli practically disappeared from their plates. Since then, it’s become my go-to when I need something that feels special but won’t chain me to the stove for hours.
FAQs About Parmesan Crusted Chicken with Basil Aioli
Can I substitute chicken thighs instead of breasts?
Yes! Just adjust the cooking time—thighs may need a couple of extra minutes in the oven.
How do I store leftovers?
Keep the chicken and aioli separate. Store both in airtight containers in the fridge for up to 3 days. Reheat the chicken in the oven (not the microwave) to keep it crispy.
Can I make the basil aioli ahead of time?
Absolutely. It keeps well in the fridge for up to 4 days—just give it a quick stir before serving.
Is there a gluten-free option?
Yes, swap the flour for a gluten-free blend and use gluten-free panko breadcrumbs.
Bring the Magic to Your Table
There you have it—Parmesan Crusted Chicken with Basil Aioli that’s crispy, creamy, and oh-so-satisfying. Whether you’re feeding your family on a busy night or impressing guests at your dinner table, this dish delivers big flavor with little effort.
So go ahead, grab that Parmesan and fresh basil, and let this recipe bring a little restaurant-style magic straight into your kitchen. Trust me—once you try it, this chicken will earn a permanent spot in your dinner rotation.
More Recipes You’ll Love
If this Parmesan Crusted Chicken with Basil Aioli recipe made your taste buds do a happy dance, you’ll want to explore a few more dishes that are just as irresistible:
- Craving another cheesy, restaurant-style favorite? Try this Steakhouse Parmesan Chicken for a bold, indulgent twist.
- Love the basil-garlic combo? This Slow Cooker Creamy Tomato Basil Chicken is the ultimate cozy dinner on a busy night.
- Looking for something quick but full of Mediterranean flair? These Mediterranean Chicken Tacos bring fresh, vibrant flavors to your weeknight table.
- Want a comforting classic with a creamy, cheesy edge? This Crockpot Garlic Parmesan Chicken Pasta is rich, satisfying, and family-approved.
Each of these recipes pairs beautifully with the flavors you already love in today’s dish, giving you even more delicious ways to keep chicken night exciting.
Print
Parmesan Crusted Chicken with Basil Aioli
- Total Time: 35 minutes
- Yield: 4 servings 1x
Description
This Parmesan Crusted Chicken with Basil Aioli is crispy, juicy, and full of flavor. The golden Parmesan-panko crust adds irresistible crunch, while the creamy basil aioli brings a refreshing, tangy finish. A restaurant-worthy dinner made simple enough for busy weeknights!
Ingredients
For the Chicken:
-
4 boneless, skinless chicken breasts
-
1 cup grated Parmesan cheese
-
1 cup panko breadcrumbs
-
2 large eggs
-
1/2 cup all-purpose flour
-
1/2 teaspoon salt
-
1/2 teaspoon black pepper
-
2 tablespoons olive oil
For the Basil Aioli:
-
1/2 cup mayonnaise
-
1/4 cup fresh basil leaves, finely chopped
-
1 clove garlic, minced
-
1 tablespoon lemon juice
Instructions
-
Preheat oven & prep chicken. Preheat oven to 400°F (200°C). Pound chicken breasts to an even thickness.
-
Prepare coating station. In one bowl, mix flour, salt, and pepper. In a second bowl, whisk eggs. In a third bowl, combine Parmesan and panko.
-
Coat chicken. Dredge chicken in flour, dip in egg, then press into Parmesan-panko mixture until fully coated.
-
Pan-sear. Heat olive oil in a skillet over medium-high heat. Sear chicken 2–3 minutes per side until golden brown (not fully cooked yet).
-
Bake. Transfer chicken to a baking sheet and bake 10–12 minutes, or until internal temp reaches 165°F.
-
Make aioli. While chicken bakes, mix mayonnaise, basil, garlic, and lemon juice in a small bowl until creamy.
-
Serve. Top chicken with basil aioli and garnish with extra fresh basil if desired.
Notes
For extra crunch, toast the panko breadcrumbs before coating.
Make the aioli a day ahead for even deeper flavor.
Keep chicken crispy by reheating in the oven instead of the microwave.
- Prep Time: 15 minutes
- Cook Time: 20 minutes
- Category: Dinner, Main Dish
- Method: Baked + Pan-Fried
- Cuisine: American, Italian-inspired
Nutrition
- Serving Size: 1 serving
- Calories: 480 kcal
- Sugar: 1 g
- Sodium: 750 mg
- Fat: 27 g
- Saturated Fat: 6 g
- Unsaturated Fat: 19 g
- Trans Fat: 0 g
- Carbohydrates: 18 g
- Fiber: 1 g
- Protein: 41 g
- Cholesterol: 155 mg